Cart
Cart


Tips for using your tent
One of the best things about being tent makers is that we have to use our product, constantly! As a result, we have learned a few things about ways of making backcountry travel and living just a bit easier. We hope these tips will make your next trip(s) just a little better.
General Tent Usage
Tunnel Tent Pitching Tip
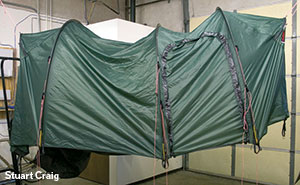
A Hilleberg tunnel tent is at its best when it is pitched properly. Its roof-line should be stretched tight, as in the photo, with no sagging and minimal wrinkles. This imparts the optimal structure – and the maximum space inside – to your tent. The key is pegging one end and then pulling out and pegging the other end, and then making the tent taut by adjusting the peg loops.
The Adjustable Peg Loops
Loosen the peg attachment loops on your tent fully before pitching. Tightening the webbing strap adds tension and contributes to providing maximum stability.
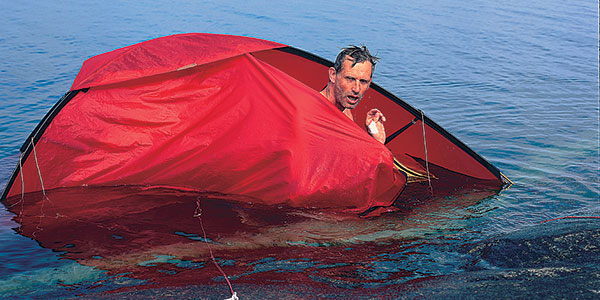
Using the Guy Lines
The basic rule for boats is to always anchor for a storm. This wisdom also applies to tents, especially in exposed terrain, since the alternative can be surprising! Even though setting guy lines is not always necessary, it is always a good idea, since mountain weather can change in an instant overnight. That’s why all of our tents have a full set of guy lines attached at spots that will maximize stability. Using the guy lines not only adds extra stability, but also makes for a quieter sleeping experience, even in very light winds. Make sure not to over tighten the guy lines. The guy lines should be taut, but not so tight that they deform the tent.
Alternative Peg Options
Sometimes you need more "pegs" than you have, and you must improvise. In the winter, skis provide excellent peg capability, as do ski poles, used Deadman-style. Trekking poles, canoe paddles, trees and even large logs or rocks can be used. When using alternate "pegs" with peg points, as opposed to guy lines, tie one end of a short line to the metal ring on the peg attachment loop of the tent and the other to your "anchor." It is a good idea to put rocks on top of the line to keep the outer tent down.
Double Poling
While only necessary (and recommended) for the most extreme conditions, adding another set of poles to a tent does provide a tremendous increase in stability. All of our tents, with the exception of our Blue Label tents, are built to accommodate an extra set of poles: in the tunnel models, you simply slide a second pole into the sleeve. In the dome models, you attach every other clip to each of the two poles.
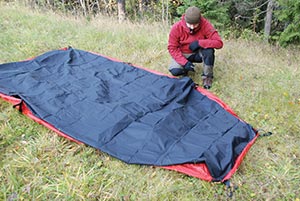
Using a Footprint
Our Footprints add an additional layer of protection between your tent and the ground. In Black and Red Label models, they cover the entire area of the outer tent, including vestibules. In Yellow Label tents, except for the Enan, they cover the area of the inner tent only. In all cases, Footprints attach easily, and can be left on the tent when pitching or packing the tent into its bag.
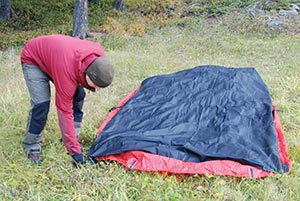
First lay out the tent, upside down, then lay the Footprint out on top, with the shiny side – the side with the Hilleberg logo – towards the tent floor.

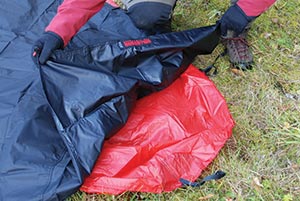
Insert the red toggles on the Footprint into the rings around the perimeter of the tent. Turn the tent over and pitch as usual.
“Line runner” knot
This knot is quite useful. It is good for adding extra lines to your tent or tarp, or any time you need a knot that will “lock” under load, will still slide easily for adjustment, yet is quick to untie.
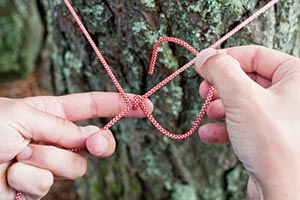
Wrap the working end around the standing line two or three times. This creates the friction and locking mechanism under load.
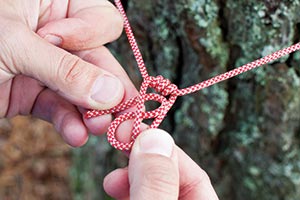
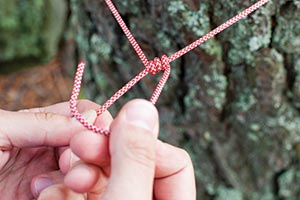
Pull the end across the wraps and over the standing line, make a loop then pass it underneath.
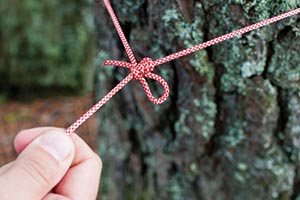
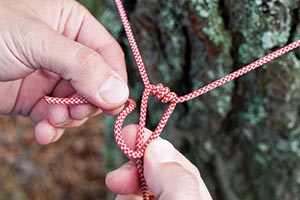
The knot is ready for loading. To adjust the tension, slide the knot along the rope. To loosen, simply pull on the end of the loop.
Keeping your tent healthy
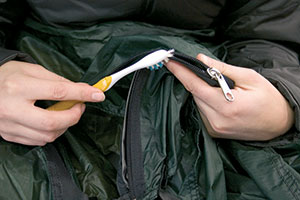
Clean the Zippers
Zippers take a huge beating, so keeping them clean is essential. Brush them off after each use, and check them after every trip. Doing so will ensure a much longer life for your tent. Avoid using zipper lubricants, since these inevitably attract grit and other zipper-eating debris, thus causing more harm than good!
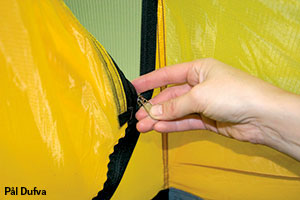
Finger in the Zipper
Whenever you zip your tent door, put the tip of your finger ahead of the slider. This keeps the door fabric from catching (and subsequently getting stuck or, worse, getting chewed up), and will increase the life of your zippers, as well.
Dry Your Tent
When you return from a trip, if possible, hang your tent with the poles still in. Failing that, hang it without the poles, but try to keep the tent walls from touching each other. This keeps mildew away, and increases the tent’s life. Make sure it is completely dry before packing it away!
Specific Conditions
Dealing With Condensation
Use a Rag
Simply wiping off the condensation from inside the tent can often prevent your gear from getting dripped upon, and it can help stop condensation from continuing to happen.
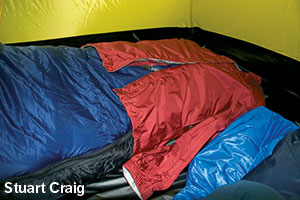
Jacket Over Your Bag
Before going to sleep, zip your waterproof/breathable jacket over the foot of your sleeping bag. This will help keep any condensation from getting to your insulation.
Footprint
Using a footprint to cover the ground in the vestibules will help reduce moisture rising from the ground.
Extreme Wet Weather Packing Option
In very high condensation conditions – super humid days, torrential rains, or the like – if the inside and outside of your outer tent is wet, you can detach the inner from the outer tent and pack it separately. At your next camp spot, pitch the outer first, then climb in and attach the – still dry – inner. Note: This is only needed in extreme conditions!
Winter Camping
Using Snow Pegs
Our Snow Pegs can be used in the traditional vertical manner or Deadman style, which is often the best choice in softer snow. Before attaching the Snow Peg’s clip to the metal ring on the tent’s peg loop or guy line, cut a trench for the line with the Snow Peg. Next, estimate the length of the line, and create a similar trench for the peg itself. Finally, press the Snow Peg into the trench – so that the line angles down from tent to peg, and cover the peg with snow. Use the peg loop adjuster (or line runners on the guy lines) to tighten up the set of the peg.
Vestibule "Furniture"
Dig foot wells into your vestibule(s). This makes for comfortable luxury while eating or hanging out, and can even provide organization options!
Winter Camping Peg Choices
Taking a couple of either our Y-Pegs or our Stinger Titanium Pegs, in addition to our Snow Pegs (left), is a good idea in the winter, especially for times when – or places where – the snow cover might be thin and/or if you end up camping on bare, but frozen ground. Our Snow Pegs will work in most conditions, but if the ground is very hard, they aren’t as effective. Having some sturdy pegs that you can hammer into the ground will make things easier.
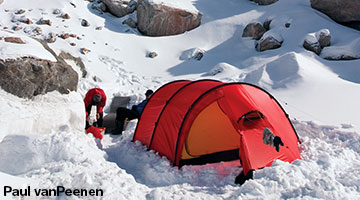
Exposed & Snow Covered Sites
To deal with exposed, bad weather conditions in the winter, we recommend digging down into the snow to create your pitching spot. The depth of your site should be no more than half the height of your tent. This adds maximum stability and prevents any wind from blowing under the outer tent. If this is not possible, and you must build a wall, place it so the drift on the lee side will not reach your tent. If you use snow blocks for your wall, we recommend making them wide so that the wind cannot easily knock them over. In less extreme conditions, dig a shallower pitching area and pile snow loosely against the bottom of the walls of the tent.
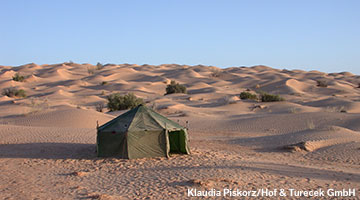
Camping in Sand
Minimize the Effect of Grit
Travel in deserts, playas, on beaches and in other similar environments puts extra stress on tents. Grit and sand amplify possible abrasion on both tent fabric and poles, and they especially increase wear and tear on zippers. In addition, such environments usually mean greater UV exposure. Here are a few ways to combat the effect of both the grit and the sun:
- Choose Hilleberg Black Label tents. These tents are designed with stronger fabric and heavier gauge zippers and fittings precisely to better handle harsh conditions.
- Brush your tent’s zippers often.
- Pitch your tent in as much shadow as you can find.
- Carry a Hilleberg Tarp for extra UV protection (the XP versions have greater UV resistance than do the UL models).
- Avoid leaving your tent pitched during the day.